Raiders of the Lost Ark
(Atari - Atari VCS)
by Chris Federico
If you expose the first Easter egg, the second will be unearthed along with the Ark. The route to this optimal ending is detailed below (along with peripheral minutiae).
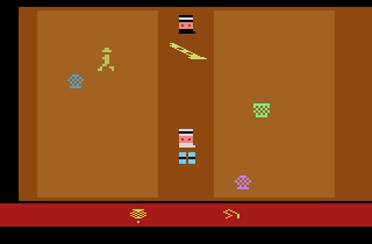
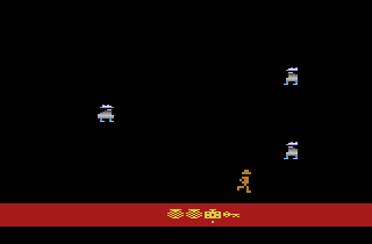
Upon assuming the role of Indiana Jones, seize the whip found in the Entrance Room, head southward to the Marketplace, and take the grenade from the blue basket.
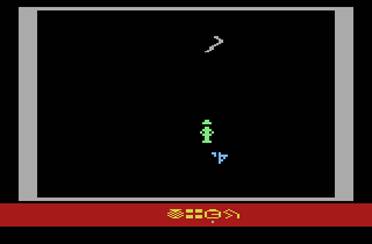
Before the snake catches up with you, drop your basket of coins on the parachute: Using the second controller, position the selector dot under the money (if it's not already there) and press the fire button. Make sure that you're touching only the parachute, as contact with its peddler will nullify the transaction, necessitating a trip to the Treasure Room for more coins.
The flute, whose song renders you impervious to snake venom and tsetse-fly poison, isn't required; your adversaries are easily avoided, and neither Easter egg is forestalled by your death -- unless it's your third, of course.
Once you've bought the parachute, revisit the Entrance Room. To ensure that you don't stroll right into the snake upon returning northward, exit the Marketplace at a safe distance from his current course, which will persist in the Entrance Room. It might be necessary to lure him to one side first.
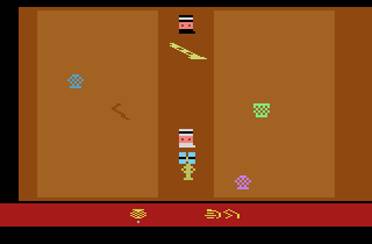
Select the grenade. Prime and drop it (by pressing the fire button on the main controller) while standing near the center of the eastern wall. Hurry back to the Marketplace; you won't survive the explosion if you remain in the room. It will occur as soon as you leave, however, so you can return without delay.
To elude the snake once again as you revisit the Entrance Room, touch the currently empty blue basket. The snake will appear near you, enabling you to exit the Marketplace from a suitably remote spot. Leave the Entrance Room through the breach you've created.
While crossing the Temple Entrance, grab the timepiece. Take the southeastern passage to the Room of the Shining Light (henceforth referred to as the RSL). You can ignore the northeastern outlet; you're only obliged to pass through the Spider Room if you've locked yourself out of the Temple Entrance.
This happens when you've
used either secret exit from the RSL (see below), which causes three barriers to
appear inside the Temple Entrance, obstructing entry from without. Two of these
are the southern exits, which are immediately blocked. While these can be
whipped open from within the Temple Entrance, westward departure from the RSL
is no longer possible. Taking the northern detour through the Spider Room is
simple enough, however, as you're required merely to continue northward while
walking against the western border; but the reverse route isn't recommended...
...as a swarm of tsetse flies repeatedly attacks from the southern periphery, rendering you temporarily unconscious several times on your way to the eastern border (the only exits lead to the east and west, as the southern entrance from the RSL is one-way). Chances are, you'll be stricken by a strand of webbing while unable to move, rousing the spider. For the record, he's not the least bit impressed by your flute-playing.
All told, making it across the Spider Room from west to east is just about achievable with persistence, but not much fun.
A barrier that slowly descends over the Temple Entrance's northwestern passage is also triggered when you use one of the secret exits. It drops a bit further at each ninety-degree position on the timepiece, and lowers too far to bypass from either side upon the third complete revolution.
It's nearly indestructible; the game's second grenade, found at the Black Market, must be detonated within the Entrance Room rupture (which was caused by the first grenade, of course) to restore travel between the two rooms. The second grenade is not available if the hand of the timepiece points upward or to the upper left, at which times the Black Market basket provides an extra key instead.
Using the second grenade isn't necessary, however, as the Marketplace can still be reached, and harbors an eastern exit itself: If you select the headpiece of the Staff of Ra (see below), and walk northward against the eastern border while holding down the fire button, you'll arrive at the Temple Entrance. This passage from the Marketplace is located just north of center-screen.
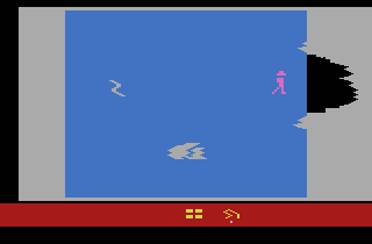
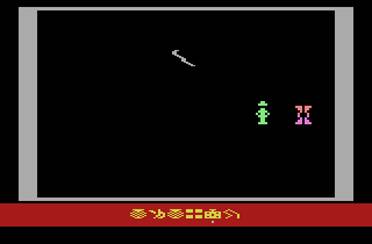
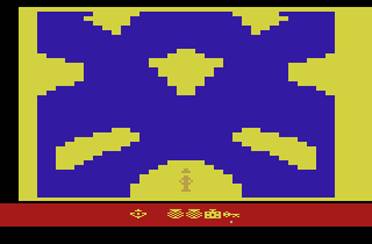
Seen here is the precise horizontal position of the left secret exit. The right one is found at the same distance from the western wall of the dungeon across the room, rather than at the symmetrically proportionate X position. You can free yourself from either dungeon at any time by walking directly southward into the border.
There's no need for any of this, of course; you can forego the secret exits by taking care not to drop the whip until you absolutely don't need it (such as before an excursion to the Mesa Field), and retrieving it whenever you subsequently pass through the Entrance Room.
Returning to the current game: Lash your way out of the dungeon, and enter the Treasure Room to the east.
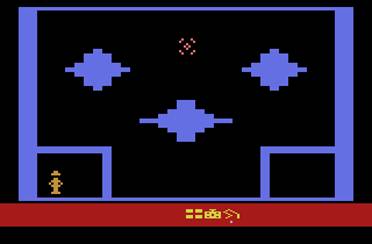
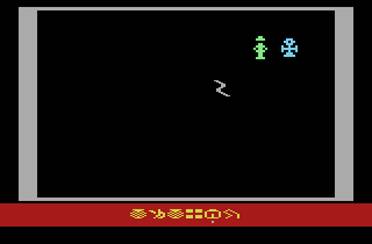
Select and open the timepiece. Each of the eight positions of its hand corresponds, in a rotating manner, to one of the three items that individually appear here when money is taken. Wait until the hand points directly to the right, as seen here, and grab the cash and the Chai. The latter will be required for unveiling the first Easter egg. It's only otherwise used for bribing the Black Sheik in the Marketplace: Dropping it on the flute transports you to the Black Market. This approach doesn't figure into the most resourceful game completion.
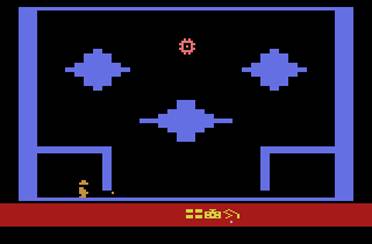
Exit to the west. Whip yourself to freedom once again, return eastward, and take the replenished money when the hand of the timepiece is pointing straight downward. You'll have to drop the timepiece, the whip or one of the coin baskets to make room for the Ankh in your inventory, so you might as well get rid of all four before taking the Ankh, as they'll interfere with your imminent feat.
While we're on the subject: Provided that you reach the Treasure Room fairly quickly after starting the game, the Ankh will appear if you grab the coins right away, while the hand still points to the upper right. You'll then have to linger only for the Chai. This is recommended, in fact, as you'll then be able to reach the Map Room without missing the first sunrise (see below).
Incidentally, the third Treasure Room item, the hourglass, isn't required. It serves as a "manual" version of the Ankh; the grappling hook will appear if you select the hourglass after entering the Mesa Field. It only comes in handy when you've accidentally dropped the Ankh while standing on a mesa, or you've departed southward from the Marketplace (having lined yourself up for emergence onto a mesa, averting a lethal plunge).
The advantage is that the selector dot can be moved from beneath the hourglass, whereas the Ankh must be dropped when you're done with the grappling hook. The drawback is that the hourglass can't immediately convey you to the Mesa Field, as Ankh activation can; if you fall, you won't be able to rescue yourself in midair by merely pushing the button.
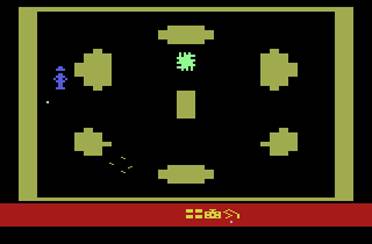
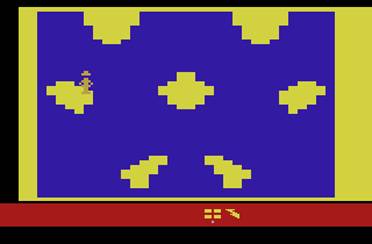
Return to the RSL and make certain that you're holding only the Ankh, Chai and parachute. Select and activate the former. You now stand in the Mesa Field. Swing to the giant mesa just north of your starting point, drop the Ankh, and select the Chai.
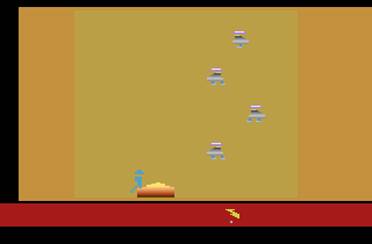
With both fire buttons at hand, walk off the edge of this so-nicknamed Flying Saucer Mesa (a coincidental foreshadowing of the fourth Indiana Jones movie).
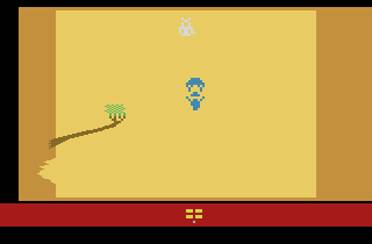
In quick succession, drop the Chai and open the parachute. The latter will be selected the instant you drop the former, as you've cleared your inventory of all surplus objects. The Yar you've summoned -- he's a giant mutant housefly from the game Yars' Revenge -- appears to be crippled, but evidently remains strong enough to hover in place (so don't feel guilty).

Once you've landed in the Valley of Poison, drop the parachute and walk to the Marketplace through one of the northernmost bogs. Unless you're concerned about your score (which won't affect the second Easter egg), there's no need to hurry. Being caught by the Master Thief won't hurt you, as you've nothing he can steal and exchange for bullets; and while the sedating tsetse flies are bothersome, they're nothing more.
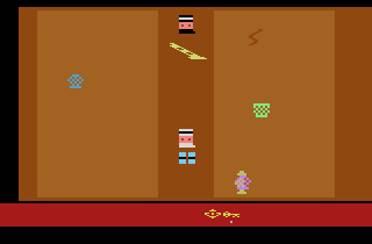
Take the key from the purple basket, and remain there until the snake gets close. Now wait as long as possible at the blue basket. Repeat this until you acquire the object with the mysteriously sporadic existence: Upon each movement of the timepiece's hand, the headpiece of the Staff of Ra briefly appears inside all three baskets at once. To avoid a longer wait than necessary, you're keeping contact as continuously as possible.
You can disregard the green basket; not only is the revolver superfluous, but crossing the large distance between the other two baskets lures the snake back and forth, granting reasonable time to wait at each basket, and thus reducing your chances of missing the moment.
With key and headpiece in hand, return to the Treasure Room, picking up the whip and timepiece along the way. If you haven't been dragging your noisy heels, the Ankh will appear when you seize the money (i.e. the hand of the timepiece hasn't advanced from the upper left position). In any case, you'll require two coin baskets in addition to the Ankh -- so you'll have to enter at least twice, eventually dropping the whip to clear a space in your inventory (once you're certain that you'll no longer need it; keep in mind that you won't be imprisoned merely for taking money).
After confirming that you hold the key, the headpiece, the timepiece, two baskets of cash and the Ankh, activate the latter -- this can't be done inside the Treasure Room itself -- and swing to the southernmost mesa. Drop the Ankh, select the key, center yourself on the mesa, and exit to the south.
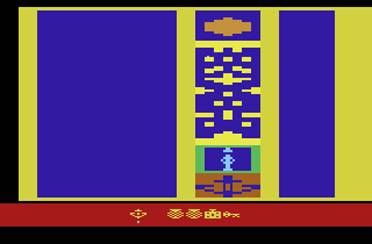
Continue southward cautiously; if you step off the pathway, you'll plummet to your death. The inner Map Room is revealed when you stand beside the blue cubicle that's situated directly above the headpiece hieroglyphic.
Walk to the middle of the cubicle, taking care to avoid budging to the north or south; these directions are only safe on the pathway at center-screen. The key must remain selected until you're centered under the map of the Mesa Field; if you select something else while standing in any other spot, your admittance into the cubicle will be withdrawn, and you'll drop like a rock in a fedora if you're not on the pathway. (The key actually allows you to walk as far to the east or west as you like, as long as you remain horizontally aligned with the cubicle.)
When you're in place, select the timepiece. As in the Treasure Room, it's not essential, but it makes the wait more tolerable. Keep an eye on it until the hand points straight up, and then select the headpiece and wait for the sunlight to reveal which mesa hides the Ark. Commit the location of the flashing dot to memory; in the game seen here, it's far to the northwest.
Select the key again, and walk straight to the west until you're back on the path. You can now drop the key, headpiece and timepiece; in the next room, however, leaving the selector dot under one of these objects will be helpful. If one of the thieves should make your acquaintance, you'll only lose something dispensable. If these objects appear directly next to each other in your inventory, select the leftmost; you'll be especially protected, as the dot will move to the right if the selected object is stolen (or dropped).
Head to the south until you find yourself in the dark. Emerge from behind the centered partition, and hasten to the southeastern corner without touching any thieves. Walk eastward while pushing against the southern border; you'll shortly enter the Black Market.
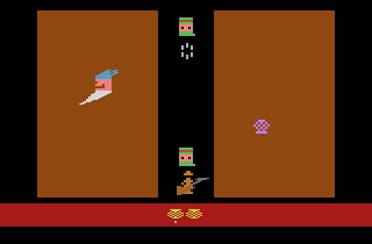
Stand on the shovel and spend your two coin baskets. The other sheik can be ignored; you don't need the revolver itself, let alone extra bullets. Be sure not to cross too far to the west, or you'll be killed by that jovial chap with the starched beard. (Should you ever wish to get past him, drop a basket of cash nearby.) After buying the shovel, depart through the eastern border, from anywhere north of center.
As before, if you hurry to the Treasure Room, the Ankh will appear when you take the money. Keep them both and revisit the Marketplace for another parachute. Activate the Ankh and swing to the mesa containing the Ark. Drop the Ankh, select the parachute and walk into the sky.
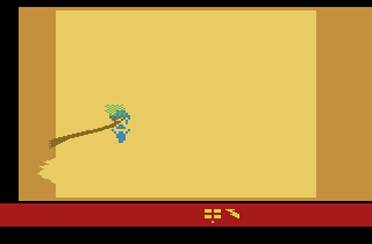
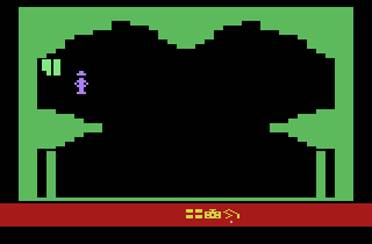
Open the parachute at once. Drift toward the branch, hesitating very briefly somewhere along the way. This short pause is necessary for catching the parachute on the bough; if you collide with it yourself, you'll fall. With sufficient timing, you'll swing into the crevice just below the branch.
Upon landing inside the mesa, drop the parachute and walk to the mound of dirt, evading the thieves. If you linger for a second or two before walking southward, you'll notice a momentary but perfectly straight course between them.
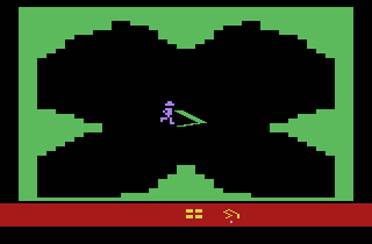
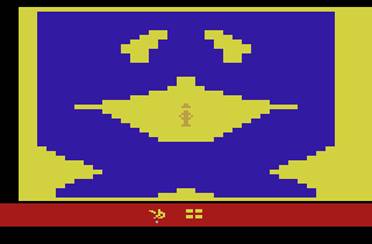
Walk back and forth across the mound, repeatedly pressing the fire button to dig (obviously having selected the shovel, if you happen to possess anything else). The mound will steadily diminish when your paces are wide enough. Prepare for your victorious...well, return to the opening screen!
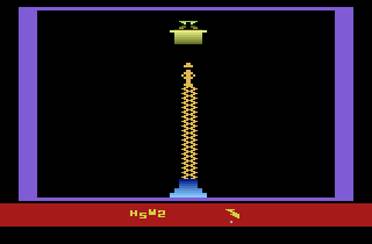
Once you've reached the Well of the Souls, the second Easter egg occupies your first two inventory spaces. The numeral following programmer Howard Scott Warshaw's initials conveys that this is his second VCS game (after Yars' Revenge).