Adventure
(Atari - Atari VCS)
by Chris Federico
You might periodically wish to convey two or more objects over a great distance. Only one can be held at a time, but the other(s) can be pushed over the wall that separates the current room from your destination (or destination vicinity). Getting yourself to the other side might require a circuitous route, but when you arrive, you'll find everything that's been forced over the boundary.
Your cursor will hold the occasional object too closely, however; even from the beginning of the game, the item won't vanish beyond certain walls. The reason is that each object is held at a fixed distance, which varies according to the direction it's been taken from. Everything that you can pick up -- including the bat -- has its own such alignment, which tentatively endures throughout the game; but it can change in each of three events.
First: If it's blinking when you take it (see below), it can wind up even closer to your cursor than usual, which certainly won't help you ram it through borders. You can nullify this minor glitch by dropping and retrieving the object once or twice in a blink-free room. Second: The bat will usually realign something in the act of seizing it. Keep in mind that he can be forced to swap objects while you're holding him, and trade them back after you've waited for a few seconds. Third (and most useful): If an object is drawn to the magnet across any distance, its alignment will shift, rather than merely its position on the screen. As a test, push the object into the nearest border. If it still won't disappear, move the magnet slightly and try again.
Granted, it's possible to "juggle" multiple objects, repeatedly dropping one by taking (colliding with) another as you move; but this grows tedious if several direction-changes are involved. Knowing which boundaries divide which rooms often comes in handy.

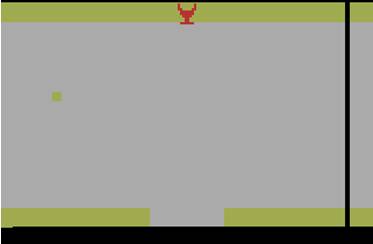
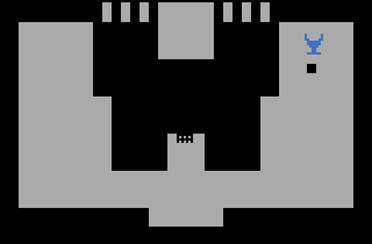
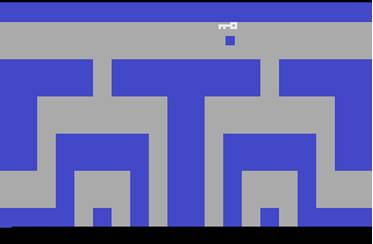
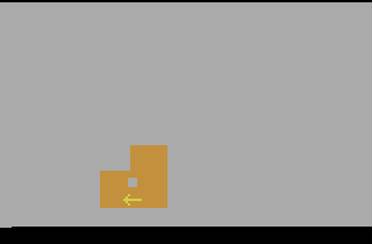
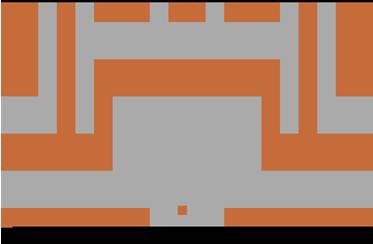
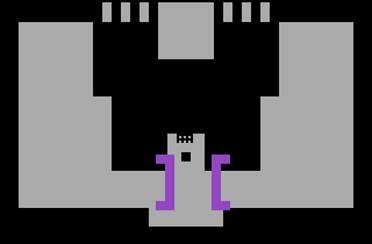
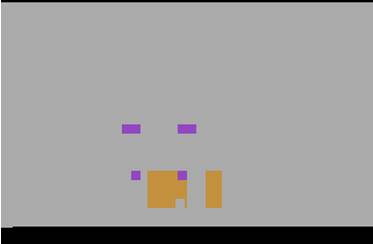
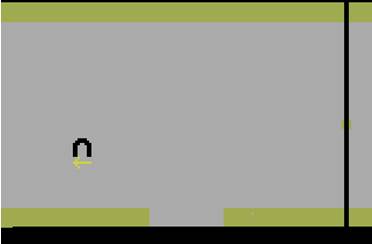
Pictured here is an applicable wall; the others are seen below. Shove the object out of bounds until it vanishes, and drop it while continuing to push your cursor against the wall. In the game seen here, we're hoping to get the chalice closer to the Gold Castle. From this remote part of the Blue Labyrinth, it ends up just southeast of the objective, as seen to the right.
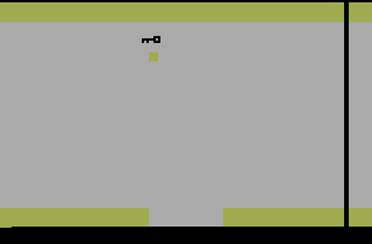
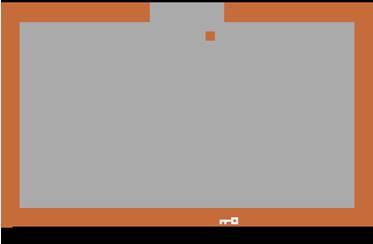
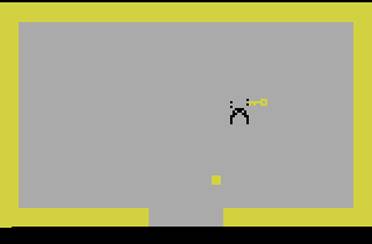
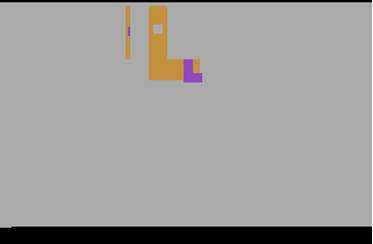
However, when this is attempted from the other direction, as we're doing here with the black key, in order to set it on a straight northward path to its castle...
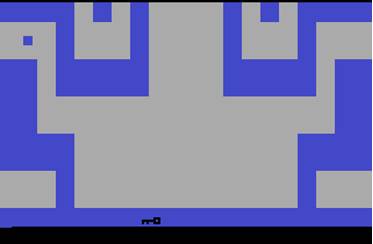
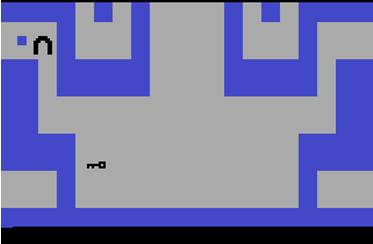
...the object might not make it over the wall on the other side. If you've arrived here without encountering the bridge or magnet, one of them is likely to be located easily. The magnet is the main adjunct to over-the-wall tactics; it should be the object that's most often kept near you. If you haven't found that, the bridge will obviously work just as well; but unlike the magnet, it's usefully left in particular places instead.
Be careful while crossing the bridge to extract something; because of its size, it can disappear off the screen more quickly than anything else. Simply ensure that it's still visible before you drop it. You can cross it over any northern or southern boundary, but usually only far enough to glimpse the room on the other side. The rare bordering room that can actually be reached is either beyond return, or quickly accessed with normal travel. Chances are, you'll wind up trapped between castle parapets. Unless you're just having some experimental fun, creating an exit with the bridge is never advantageous.
Returning to the pictured game: Objects can also be pushed to this Blue Labyrinth room over the northern periphery of the Gold Castle exterior, mysteriously enough.
The Black Castle exterior also allows for beneficial northward conveyance, this time to the room just southwest of the Gold Castle. As in the last example, the magnet or bridge is subsequently needed. Speaking of the magnet, bear in mind that it won't affect more than one object in view. If something with greater magnetic properties is brought into the room, the prior object will no longer be attracted (even if the new one isn't dropped). Here are the objects' susceptibilities to magnetism, from highest to lowest: the gold, white and black keys; the sword; the bridge; and the chalice. Therefore, should you wish to cross the bridge while carrying the magnet, the presence of the chalice won't help; but anything else will be lured instead of the bridge.
Over the wall in the other direction (toward the south) stands the White Castle. We're transporting the bridge there, so that the Red Dungeon within can be thoroughly searched later. An object forced back over the white northern edge, however, will be moved just two rooms southward (and back to the White Castle exterior in the opposite direction over that southern wall). More helpfully, it will travel eastward or westward to the Black Castle exterior from that southern room.
An object hoisted over this Blue Labyrinth wall will turn up reasonably close to the White Castle: in the southern room east of the Catacombs.
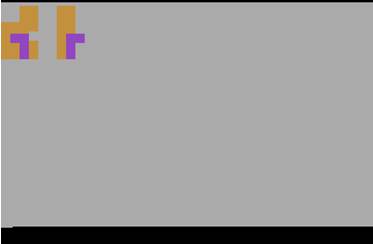
Sending something in the other direction from that southern room transports it to the Black Castle. Even small objects can occasionally be dropped within reach; in the game seen here, the sword travels just far enough to be reclaimed. If an object is heaved over the red eastern or western wall, it will land behind the thin barrier in the room southwest or southeast of the Gold Castle. Turning our attention back to the Black Castle exterior: Over the eastern and western walls is the room...
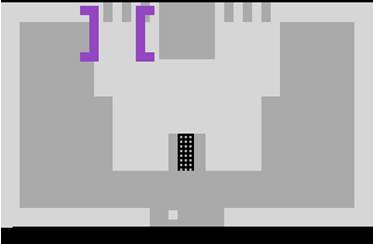
...pictured at right. An object that's cast from the southernmost Catacombs pictured at left will also be found here, which is just one room to the northeast. This isn't terribly practical, however; nor is pushing the object back over the purple northern boundary, as it only travels two rooms southward. If it's dispatched over the purple eastern or western wall, however, it will end up in the southern Blue Labyrinth.
No further borders provide useful object transference. (Castle interiors lead back to their gates or themselves, and every other screen-wrap is either obvious or very slight in span.)
Onward to other strategies. The bat should be removed from the action as quickly as possible. Once you've cleared a castle of objects, catch Knubberrub (the bat was named thus by the programmer, even though this isn't mentioned in the manual) and force him to take something that you won't be needing, such as a dragon -- dead or alive -- or the key to an opened castle. Ensure that he picks it up from the south, or a general southward bearing. Now bring him into the selected castle and let him go.
The Gold Castle is recommended, as it's the easiest to assuredly empty. As long as he flies to the north, east or west (or in between), he'll re-enter the castle indefinitely. He can't change course anywhere in the Kingdom unless he spots something to steal; he'll escape from the castle only if he turns southward toward fresh plunder.
If you've accidentally brought something inside, try to catch him before he gets away, and hold him in place just south of his previous cargo (if you've prevented him from reaching his target, make him grab it anyway, as he won't change his mind). After a few seconds, force him to trade back. Remember that his imminent heading can change even as you hold him; it's often helpful to leave an object in one of the northern spaces just outside the chosen castle, even if you've no intention of letting him take it. This will be valuable if you happen to seize him while he's already clutching whatever you'd like to imprison him with, or if you carry him through a room in which something lies inconveniently south of your exit point. His most recent desire determines his trajectory upon being dropped, even if it's no longer in view.

Grundle the Green moves faster than Yorgle the Yellow, but Rhindle the Red is the swiftest. (Hansel and Gretel have apparently gone astray!) Each dragon takes the respective amount of time to swallow you after his mouth opens, assuming that you don't (or can't) move before it closes. The bat can still fly off with the dragon while you're trapped in the latter's stomach, taking you on quite the tour.
Be aware that a dragon in pursuit departs each room through the border he's most recently seen you exceed. If he winds up in a cursor-free room, he'll continue on his latest course; so you'll shake him off by making an abrupt ninety-degree turn before he catches up.
If you lead him to an object that he likes, he'll stand guard over it, merely trying to chase you out of the room. All three dragons are greedy about the chalice; Grundle is fond of the magnet, bridge and black key; and Rhindle prizes the white key. Conversely, Yorgle leaves any room that contains the gold key.
Two further dragon traits assist you. First: You can travel westward through any dragon, even as he opens his mouth. (He's impassable from the other direction.) Second: If you continually push to the south against any surface, you can't be swallowed, even while you're moving along it.
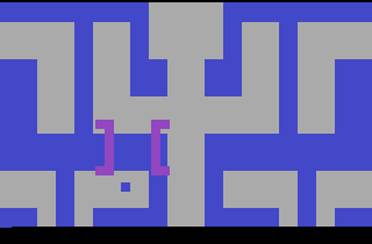
To the left, the bridge has been placed for access to the independent passage through the Red Dungeon. Entering the symmetrical corridor works just as well; it's simply the other end of the passage. Pictured at right is the exit encountered along this detached route; strangely, it's blocked by the opposite boundary one room to the north. The bridge can be crossed back and forth from the other side, but there's really no need for this.
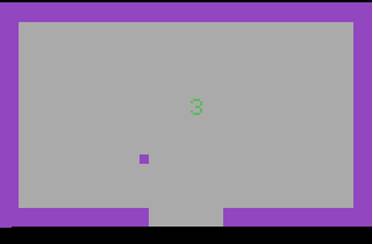
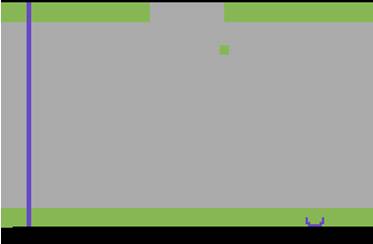
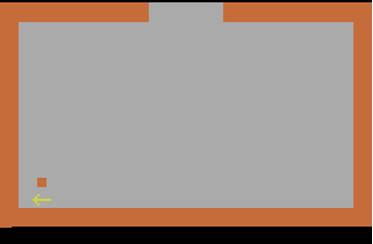
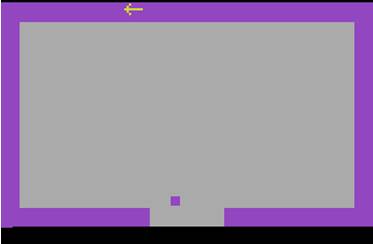
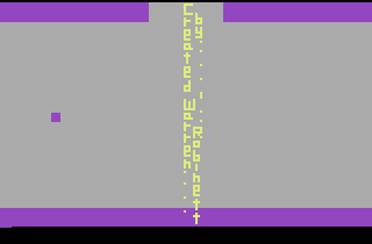
Some interesting idiosyncrasies: Pushing the Game Select switch just after you've delivered the chalice to the Gold Castle will slow down the victory music, making it even more peculiar. If you've pushed that switch (thus returning to the selection screen pictured to the left) after starting a game, the controller's downward direction will summon your cursor. You'll be able to control it as usual, but the exit will be blocked. (Incidentally, if you could leave, you'd arrive in the central room east of the Catacombs.) You can't pick up the game number; it behaves merely like a block-sized boundary.
Also, any key can be locked inside its castle; take care not to drop it inside the entryway while the gate is closing. Finally, if you've explored the entire Kingdom in Game 3 -- the random-arrangement variation -- without finding the gold key, push Game Select and then Game Reset (to start afresh; a mere reset will only resurrect you and any slain dragons). The key has been placed inside its own castle.
If you're accustomed to playing Game 2 or 3, remember the bridge-dependent shortcut made conspicuous in Game 1; it creates an extremely convenient course to and from the Black Castle.
To expose the game's Easter egg, you'll require the magical dot. Start Game 2 or 3, each of which grants access to the entire Kingdom. Incarcerate the bat as soon as possible; he won't be able to see the dot, but he'll be disruptive nonetheless. (The dot also won't be affected by the magnet.) Bring the bridge inside the Black Castle.
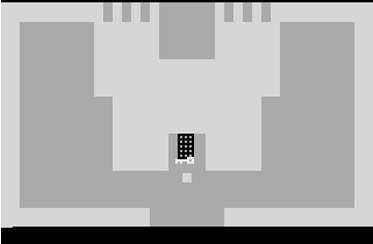
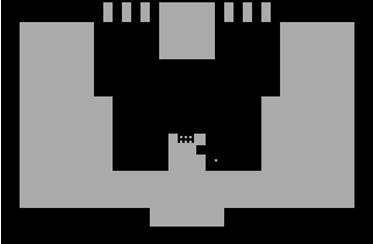
Travel northward into the first darkened room. The dot is hidden inside a wall just one room to the west; this is most easily reached by way of the twisting passage seen here. Simply bear westward before advancing to the north, and follow the passage until you find yourself in the northeastern corner of the dot's room. You're in the right place if the bridge and your cursor's surrounding square of light are flickering.
When any room contains three or more objects, they repeatedly blink. These include dragons, castle gates (opened or closed), the bat and the illumined space around your cursor in dark places. You can therefore determine if something's hidden within the Gray Dungeon or Catacombs (an object can be entirely invisible when, for instance, the bat has dropped it onto one of the interior walls). Just bring something along and watch for the flickering.
Also be aware that your cursor can slowly travel through a blinking dragon carcass that blocks your progress -- or a living dragon, for that matter, although you'll be swallowed if you're still touching him when his mouth shuts. All collisions are impaired by the flicker; a gate might fail to open, and dragons aren't slain as easily.
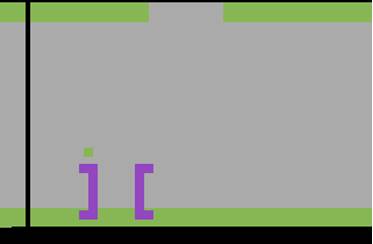
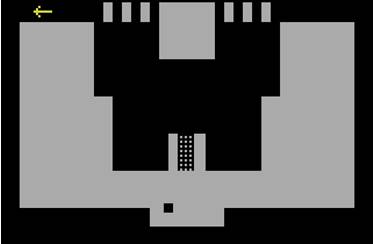
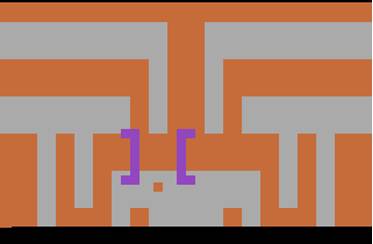
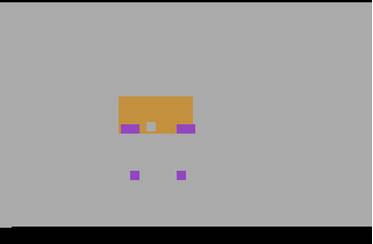
At least we can easily distinguish the room that contains the magical dot! Drop the bridge where it's pictured at left: over the wall just southwest of center. After crossing it, push against the southeastern corner of the small space you've accessed, as seen to the right. You'll hear the dot being picked up; the blinking will briefly cease if you push the dot through the southern boundary. Be careful not to drop it while it's off-screen. Carry it carefully over the bridge, and backtrack until you leave the castle.
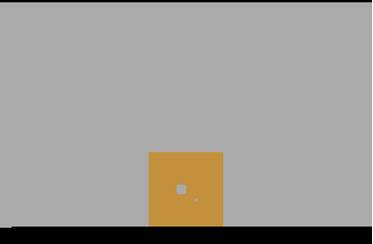
Notice the dot as we depart from the darkened region. In this Gray Dungeon maze and the Catacombs far to the south, the dot can be seen within your lit area; in any other place, it's only visible while you're holding it against a wall.
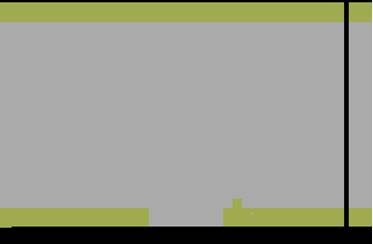
Drop the dot inside the room southeast of the Gold Castle. If it's left on top of a wall, you'll still be able to reach it if you want it later, except in rare cases; simply refrain from pushing against the wall as you press the fire button. When at least two other objects are present, the flickering enables passage through the thin eastern barrier.
Certain object combinations won't work; if you still can't breach the barrier, try replacing or adding something (or, if there are already three objects here besides the dot, removing one). On very rare occasions, one object will be enough. This tends to be the sword or a dragon. You're advised to drop two anyway, as you might not get through the barrier on your way back.
On the other side of the barrier is the Easter egg that has hatched thousands of others.